This kit includes FREE Ground Delivery to the Lower 48 States
Top Flaps Improve Plow Function
Top flaps transform snow plows making them much more functional and useful for the operator. The top flap
keeps snow off the tractor operator
or off the windshield if you have a cabbed tractor.
rolls the snow ahead of the plow, to improve the plow’s snow clearing ability.
Our UHMW Strap that mounts the top flap never needs painting, can’t rust and is very strong and durable. plus it looks great on the plow.
A snow plow without a top flap just stacks the snow ahead of the plow until it begins to fall over the top of the plow and onto the hitch. This can lead to additional snow clearing passes to clean up the snow which is falling over the plow due to the snow depth.
Once you have plowed snow with a top flap, you won’t ever want to plow snow without a top flap again. The top flap make snow plowing more efficient, improves the plows function and makes the plows snow clearing capacity so much greater.
Deere doesn’t offer a top flap, so we do.
The Deere 54” and 60” Front Plows are great plows for the Deere machines. But every snow plow benefits from a properly and professionally made top flap kit. This is why we offer this kit, as it makes a great plow, even better for our customers use.
Simple to Mount on your Plow, Here is the Installation Process
Since John Deere Doesn’t offer a top flap for their plows, they also don’t drill the mounting holes for the top flap in the plows top edge. We provide you with detailed instructions to make the process easy. Here is a summary of the installation process.
Use our rubber top flap and center it on the top flap flange to mark the hole locations along the top of your plow. Mark the center of each hole.
Once the hole centers are marked with ink, remove the rubber top flap and set it off to the side.
We suggest you use a center punch to mark the drilling location, to make it easy and so the drill doesn’t want to drift on the steel edge.
Place the drill bit tip into the center punch mark and drill each hole carefully. Our flaps have 8 to 10 holes in total to hold the top flap properly.
Align the rubber top flap and UHMW strap to match the new holes. Put a bolt through the UHMW strap and rubber and tighten the bolt finger tight.
Install the remaining bolts in the top flap until all are finger tight.
Starting in the center, tighten the bolts snugly with hand tools. 120 inch pounds or 9 to 10 Ft Lbs is the torque limit. Tighten the center bolt first, then one bolt left of the center and one bolt to the right. Alternate back and forth until all bolts are tight.
You are done. It’s that simple….
Our top flaps are machine cut for precision. The top flap has round holes where our UHMW straps have rectangular notches machined to hold the carriage bolt shanks. Push the carriage bolt into the strap notch and insert the bolt through the hole in the flap and plow flange. Put a washer under the top flap flange, finger tighten the nut.
As you tighten the nuts, it pulls the bolt into the rectangular slot to keep it from spinning. You can tighten the bolts with a wrench, a socket, just don’t over tighten them as it distorts the strap and edge. We want the strap and edge nice and smooth across the top of your plow.
Made from high quality rubber, which offers the best combination of flexibility, function as well as making the plow complete.
Made in S.W. Michigan, U.S.A. and very proud of it.
Standard Top Flap or Extended Top Flap, you choose
We offer two plow top flap kits for the Deere 54” and Deere 60” Front Plow. We have our standard rectangular shape top flap and our Extended Wing Top Flap. The standard top flap is cut square with the ends of the plow. The extended Top Flap is 4” longer and has “wings” on the ends of the top flap, to help direct snow off the end of the plow when the blade is angled.
The reason I designed the “extended or Wing” top flap was I noticed when the snow was deep and I was plowing with the blade angled, the snow would often just go off the end of the plow onto the road side bank and then fall back into the road as I passed. When I tried the “Wings” or extended the top flap, it helps to direct the snow further off the end of the angled blade. This helped reduce the snow falling back into the road. Every little bit of additional snow clearance helps.
Other than the wings, the plow top flaps are identical. They are the same thickness and same material, its just how the final cuts are made on the rubber.
All of our Top Flap Kits Come Complete with
Fully cut and holes machined into the Top Flap and Mounting straps
Hardware to mount the top flap on your plow
Detailed instructions, with installation tips and suggestions
Use and care instructions after your top flap is installed and being used to clear snow.
Tools Needed to Install Your Deere 54” or 60” Plow Top Flap
Marker to mark the center of the holes in the rubber flap on your plow
Power Drill and 5/16” or 3/8” drill bit
Center Punch and Hammer to mark hole centers (optional but suggested).
Ratchet and socket or an open wrench to tighten the nuts
Typical install takes 10 to 15 minutes.
Install with the plow on or off your tractor, whichever is easier for you.
Simple and effective. Easy to Install and requires very little care. Those using the top flaps are very positive about their plows performance. Most say “I should have done this much sooner”.
Makes a Great Gift
Do you have a family member or friend with a Deere 54” to 60” Plow? These make great gifts as they improve how the plow functions. Make sure to also check out our plow edges to truly transform the plow into a quiet, effective and useful pavement clearing machine……
Questions or need help?
Contact us. We are glad to help.
Office Phone 269. 428. 9932

 Image 1 of 3
 Image 2 of 3
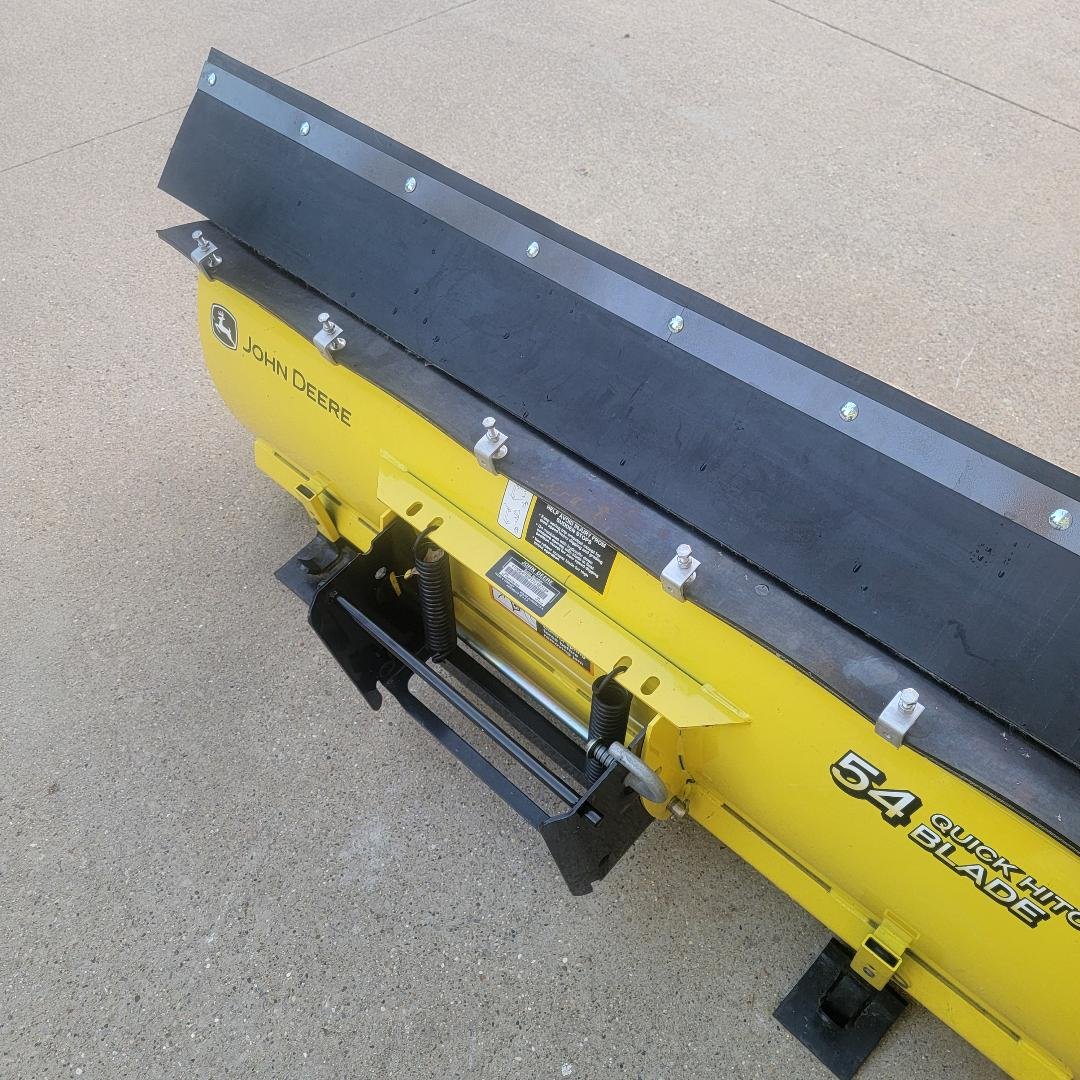 Image 3 of 3